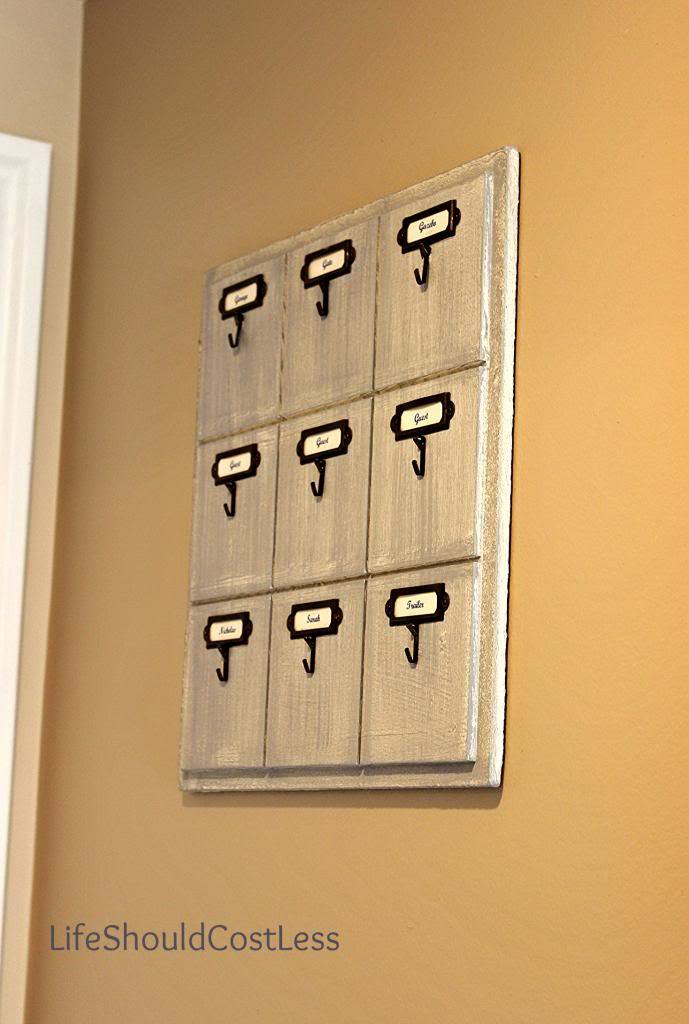
I am in love with hotel style key racks! I just think that they are so pretty and about a million times better looking than the cheesy ones that we all made in middle school shop class. Surprisingly though, I couldn’t find a lot of options out there to buy one (especially if you don’t want to spend an a ton of money). You either get the option of one with 20 hooks (which is way too many for our needs), or some with only 5 or 6 hooks (which isn’t going to be quite enough) so I decided to make my own.
A few of months ago I came across a tutorial for making one that I really liked, but I wanted to do it a little differently so I thought I’d share with you all what I did to make this.
*Hey there, thanks for stopping by my website. This article is super old, so it has been archived as I no longer update it…so proceed if you wish…but it is definitely not my best work. Please stop by my home page, here, and see some of my better content. Thanks! ~Sarah*
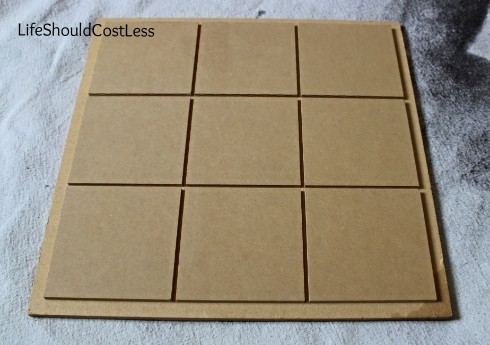
I think that the biggest headache of this whole project was deciding what to use for my board. I didn’t want to glue together cut boards and I looked high and low for a pre-made cupboard door that would work but I didn’t find one until I had already painted this board…dang it! Isn’t that how it usually goes? *The cheapest pre-made cupboard doors that I could find were in the “As-Is” section at Ikea so make sure to take a look there if you want to go that route.* Anyway, on to the project:
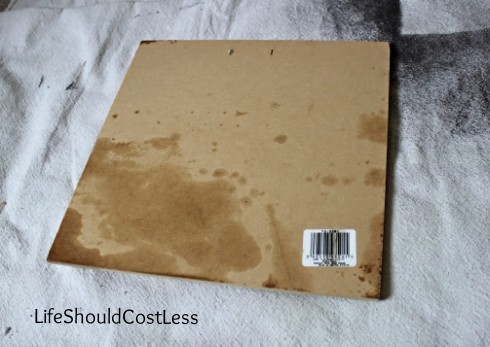
I found this little board at the DI (a local thrift shop) for a buck and decided that it might work so I gave it a try. It was pretty damaged but the chalk paint that I used covered the grease stains right up and it hasn’t seeped through even days later.
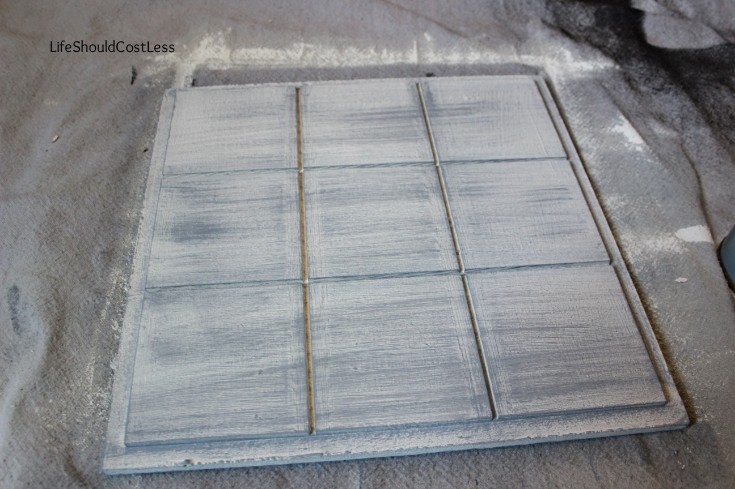
I still had some left-over paint from my cedar-chest make-over and formal living room mirror make-over posts so I just used what I had on hand. Sorry if you guys are getting sick of my paint colors. It’s amazing just how far those tiny cans of chalk paint stretch. I used 3 coats of Americana Decor Chalky Finish paint in Lace followed by two dry-brushing coats of Yesteryear (same brand) to get this look. *This brand of paint dries much darker than you’d think so keep that in mind if you use Americana Decor*.
Once the paint had dried well I added some of those Sawtooth Hangersto the back.
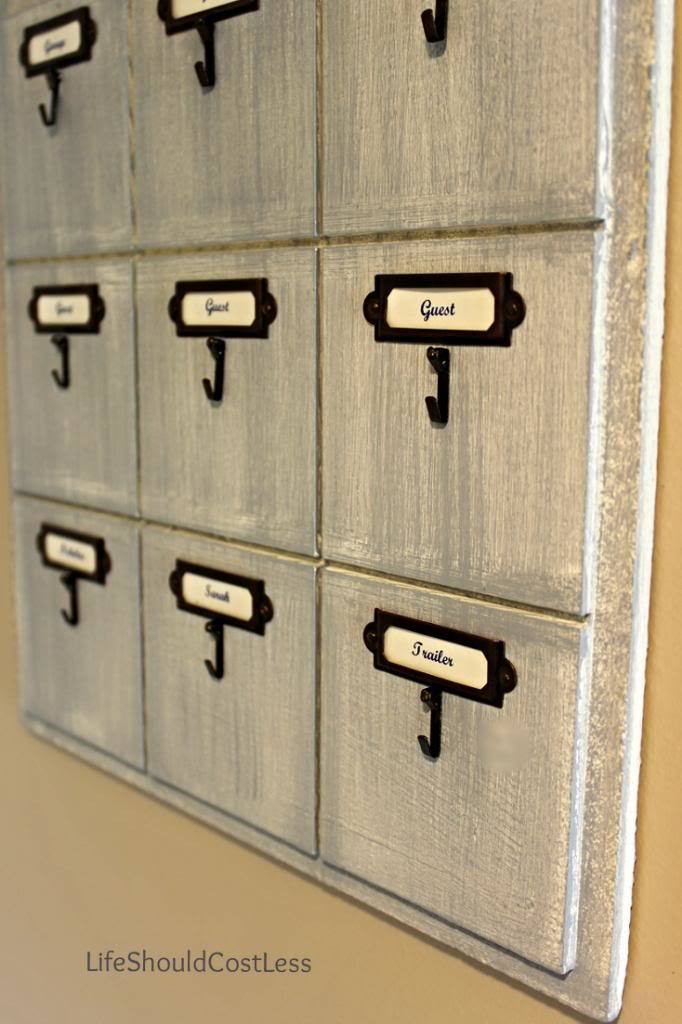
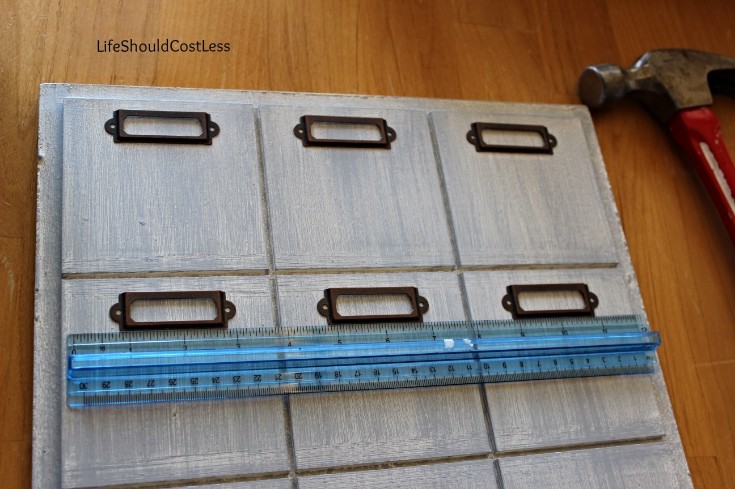
This was followed by deciding where I wanted the Label Holdersand I stuck them in to place. The Label Holdersare actually a scrapbooking supply so they have these little stickers on the back that are pretty helpful to get your spacing just right before you nail them in to place. *Please note that when you buy these the package says 20 pieces which is not true, they are counting for each little pre-made label in the package that you are probably going to be throwing away. There are 5 in a package.*
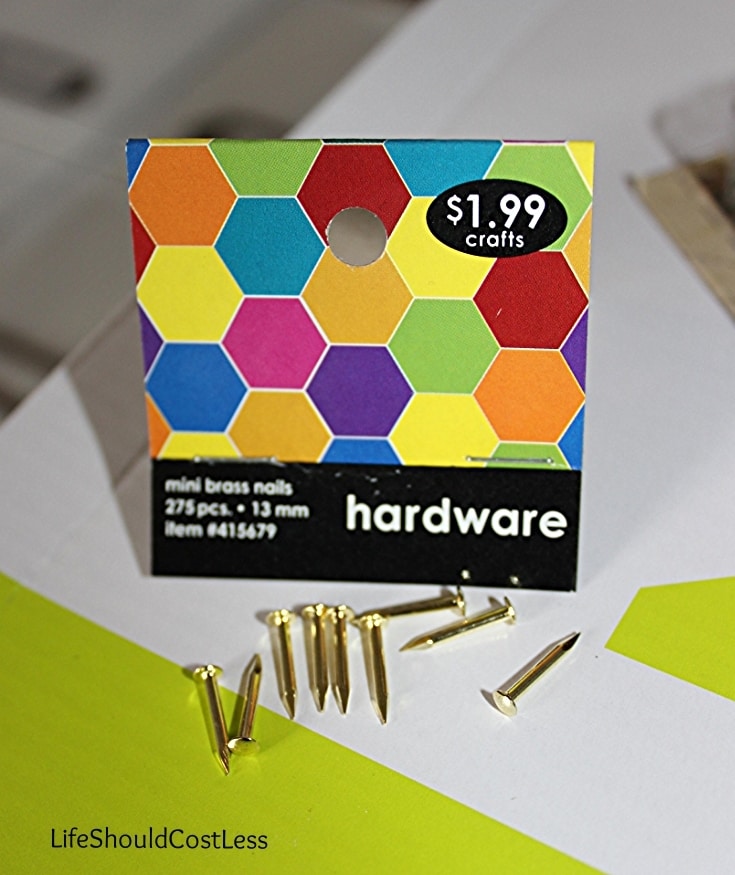
I couldn’t find any oil-rubbed bronze nails (which is what color our hardware is going to be throughout the house) so I got these at Hobby Lobby in the wood section and they worked great! I’ll show you what paint I used on them later.
Next came deciding what hooks to use. I really wanted some of the rounded screw in kind, but I wanted them to have a ball at the end. I hope that makes sense. I looked all over and couldn’t find any and decided that I liked these picture hangers (purchased in the frame section at Hobby Lobby) even better than just a standard screw in hook.
These hooks were then spray painted in the closest color I could find to oil rubbed bronze and then nailed in to place. They didn’t have the color that I needed at Home Depot, so here is a link if you’re looking for some Oil Rubbed Bronze spray paint.
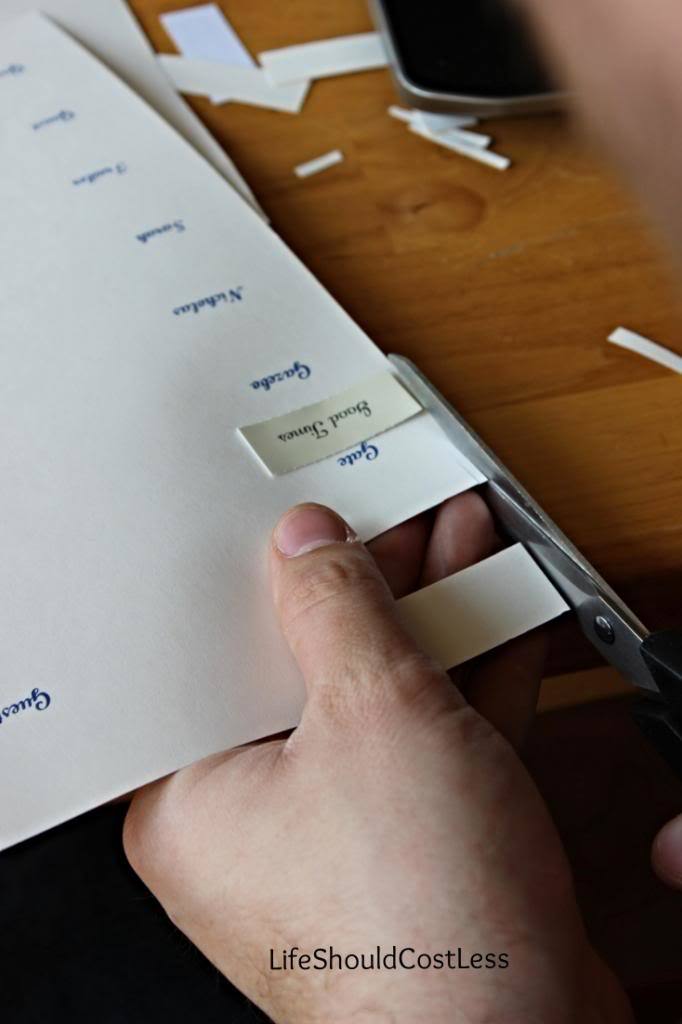
For the tags I bought some cream paper and then picked a nice looking font (Script MT Bolt, size 16). My husband used the labels, that came with the label holders, as a template to cut out each new label.
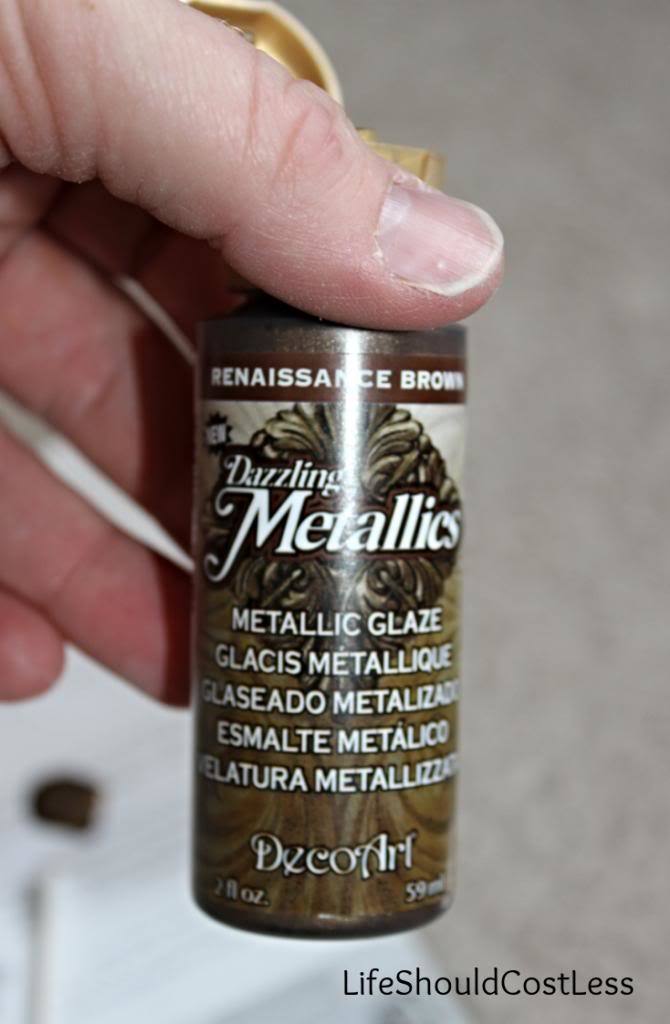
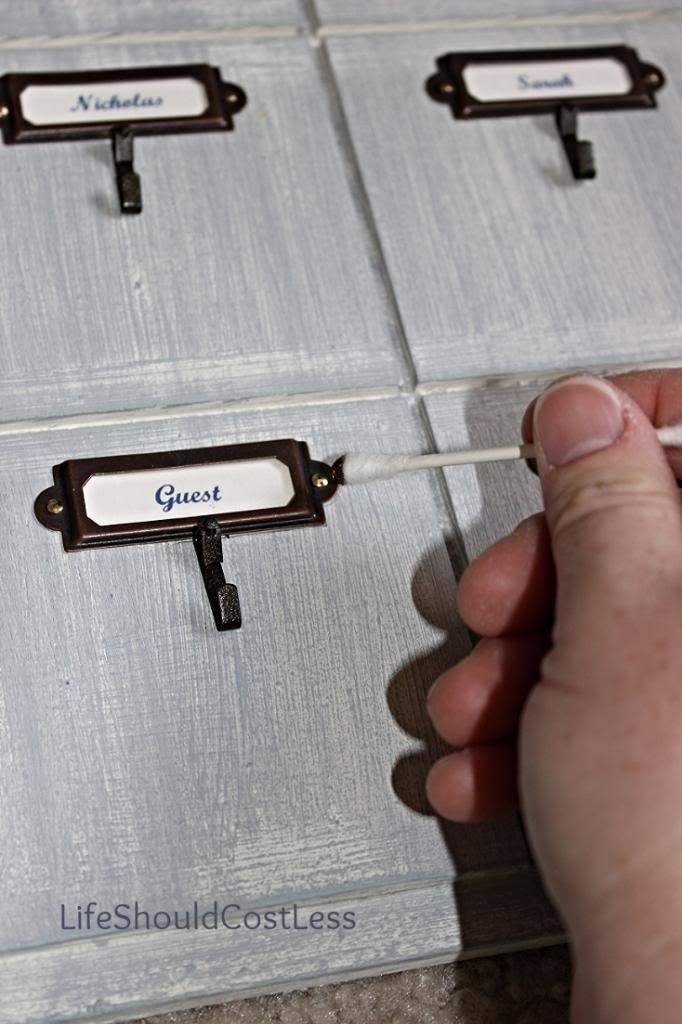
To cover the nails and touch up any parts of the hooks that needed it I went with this paint. I just used a q-tip to apply it and it did the job!
.
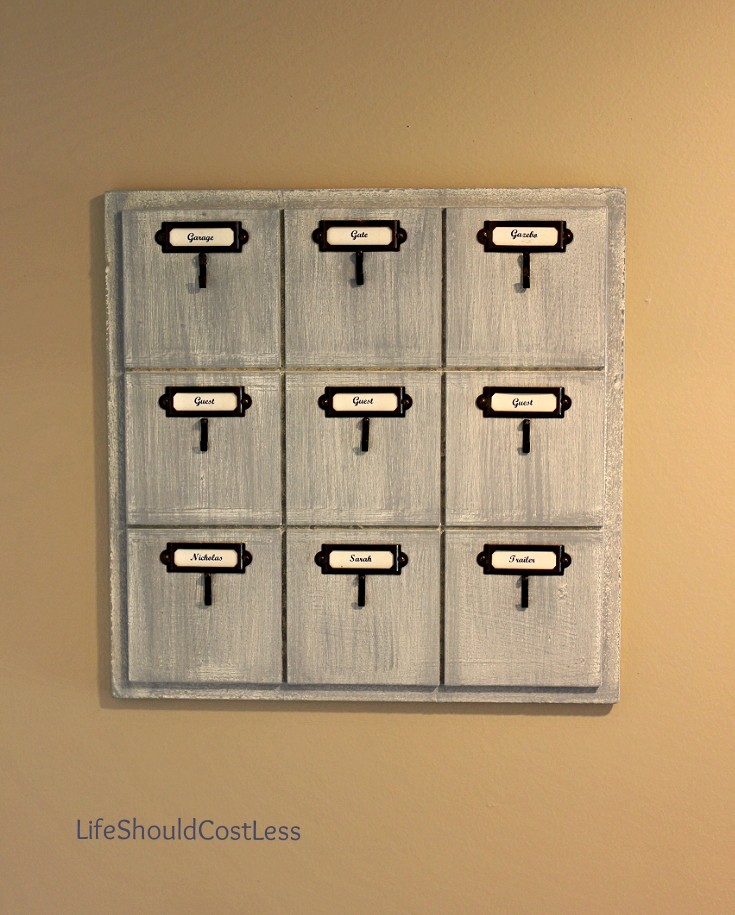
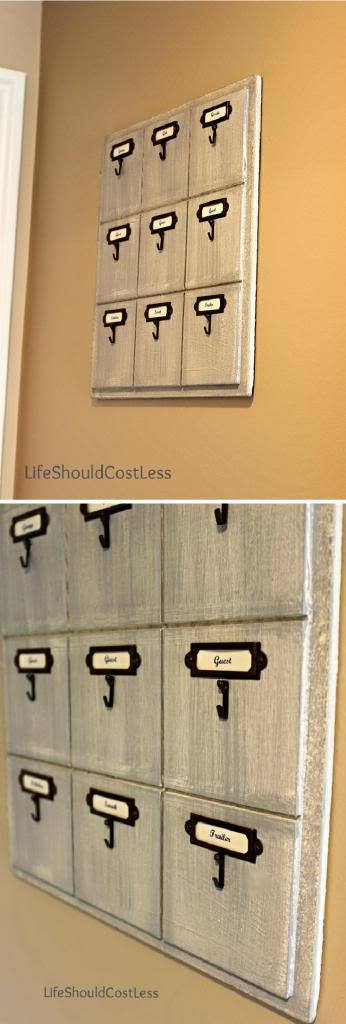
Next was to hang it on the wall and enjoy it! I’m pretty happy with how it turned out. Even if it did take me forever to find everything that I needed. Hopefully I’ve saved some one out there some guess work.
In case you forgot, here is the final product again.
*Hey there, thanks for stopping by my website. This article is super old, so it has been archived as I no longer update it…so proceed if you wish…but it is definitely not my best work. Please stop by my home page, here, and see some of my better content. Thanks! ~Sarah*